With its real-time plugin, Krea AI takes product placement to the next level by allowing instant previews and adjustments as you work. Whether designing marketing visuals or creating unique content, this powerful tool saves time and delivers professional-quality results that captivate your audience.
Krea AI transforms how professionals create visuals. E-commerce owners can display products in various settings to reach different audiences. Digital marketers can quickly produce compelling product ads. Social media managers can seamlessly place products to meet content demands. Photographers can enhance product photoshoots with polished, professional results.
In this tutorial, we’ll show you how to access the Krea AI editor, prepare an image, place your product inside the image, fine-tune your results, and download the finished picture.
By the end of this tutorial, you’ll be able to
Access the editor
Prepare your image
Place your product inside the image
Fine-tune the result and download the image
Place another product inside the image
Let’s get right into it.
Step 1 - Access the editor
Go to Krea’s website and sign up for a free account, or log in if you already have one.
-
Remember this: Krea offers minimal access to Flux and real-time plugins with a free account. The minimum for a basic account is $10, which covers you for a month.
Once you're in, click on the "Edit" button at the top to open the editor. You’ll be ready to start adding products to your images right away.
-
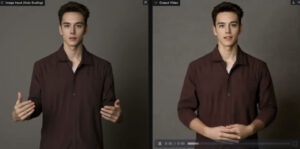
The editor screen is intuitive and easy to follow.
-
Step 2 - Prepare your image
In the editor, click the upload button to add your base image. This could be an AI-generated image, a photo you already have, or any professional photo you can use. Make sure the image reflects the scene where you want to place your product, such as a model photo for accessories or a room setting for furniture.
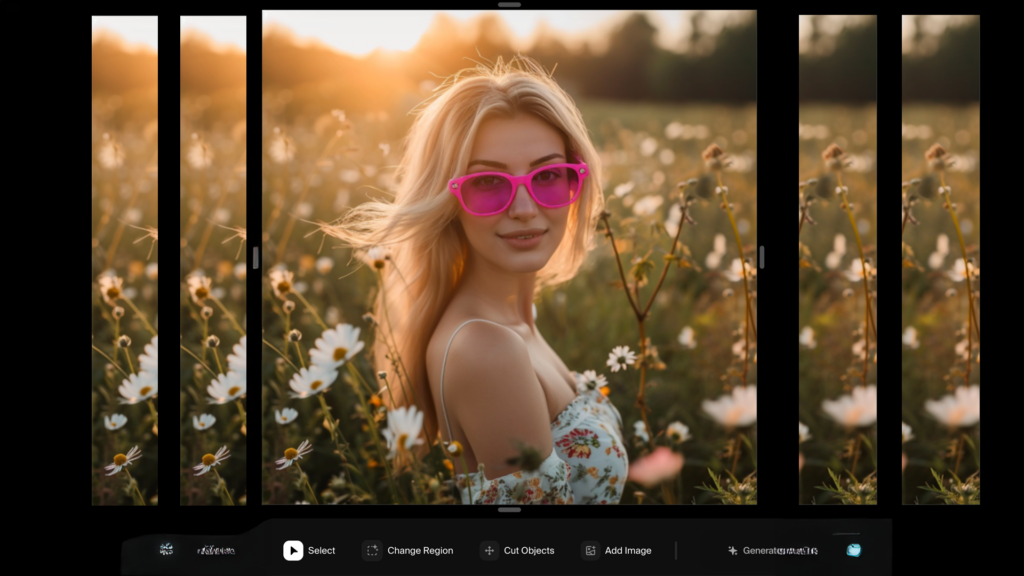
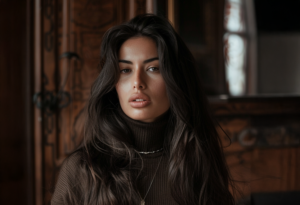
For this tutorial, we are placing a sunglass on a young model’s face.
-
Before placing a product in the photo, ensure the image is proper and has a high resolution. Choose an image that reflects the product you are focusing on.
Step 3 - Place your product inside the image
To get the best results with product placement, it's crucial to select the correct region in your image and ensure your product image is high quality. This will help the product blend seamlessly into the scene and look natural.
Click the "Change Region" button at the bottom of the interface.
-
Carefully draw a region where you want the product to appear on your canvas. Consider the natural perspective and composition of your image to ensure the placement looks realistic.
After selecting the region, describe your product in the prompt box. In our example, it’s clear sunglasses.
Prompt:
Funky sunglass.
-
To get more accurate results, upload your product photo using the image prompt feature. This ensures the product matches your scene perfectly.
Click ‘Generate’ to create an image with your product.
-
That came out pretty well. You can always touch up the image to create a perfect photo of your product. To add your logo to the image, click ‘Add image’ and insert your logo.
-
Step 4 - Fine-tune the result and download the image
Before generating your final image, make these important adjustments:
Region size and position: Ensure the region matches your product's intended scale within the scene.
Product description: Be specific about the materials, style, and appearance for a more accurate result.
Image prompts: Upload clear photos of your product from relevant angles to help the AI understand the details.
Training option: Use the "Train Subject" feature for more professional and customized results.
The train subject feature allows you to fine-tune the product placement by uploading different angles of your product. This ensures that you get a precise placement and a professional photo.
Click ‘Change region’ and then click the link icon at the right of the prompt box.
-
Now, click ‘train a subject.’
Here, you must upload at least 3 or more product images in the same style with a different orientation. This allows Krea to train a stable diffusion model to generate precise image placement.
Name the image and click ‘Add 2 more images.’
-
As you upload more images, the average resolution will improve. Once you’ve uploaded the photos, click ‘Train AI.’
It will start training the model. Meanwhile, copy the trigger code and use it in the prompt box.
Paste the style code in the prompt box, draw the region again, and click ‘Generate.’
-
Krea will use the style you created and trained its model with.
That came out pretty good. We can use it on social media to promote our pink sunglasses for women.
Step 5 - Place another product inside the image
Let’s place another product inside the image to test it out. In this example, we put a necklace around the neck of the model in the image.
Select the original uploaded image of the model. Click ‘Change region’ and draw a rough drawing of the necklace around the model’s neck.
I
Write a prompt and upload a picture of a necklace.
-
Click ‘Generate.’
That’s not bad at all. However we want to ensure the product is the same as in the image, so we will use the model training feature to upload three or more images of the same product.
Copy the style code in the prompt box, rewrite the prompt so that it is clear for the AI to understand, and click ‘Generate.’
-
It showed the exact product! That’s a success.
That’s it, folks! Experiment with various prompts and product images. In minutes, you can create a professional-looking, high-res-quality photo for your social media channels.


Validate your login
Sign In
Create New Account